


Closing an Open Sole Area to Protect the Hoof Sole
Most of our horseshoes have an open sole area and an integrated debris guard , as this is the best combination for most horses. Thanks to the open sole area, the hoof sole and frog can breathe, and the integrated debris guard — similar to a Snowgrip® in a steel shoe — largely prevents mud and snow and sand from the arena from balling up .
However, what works well for most horses does not necessarily apply to all, and thus there are situations where it is necessary to close the open sole area in order to protect the hoof sole.
Closing the Area of the Hoof Sole — Photos
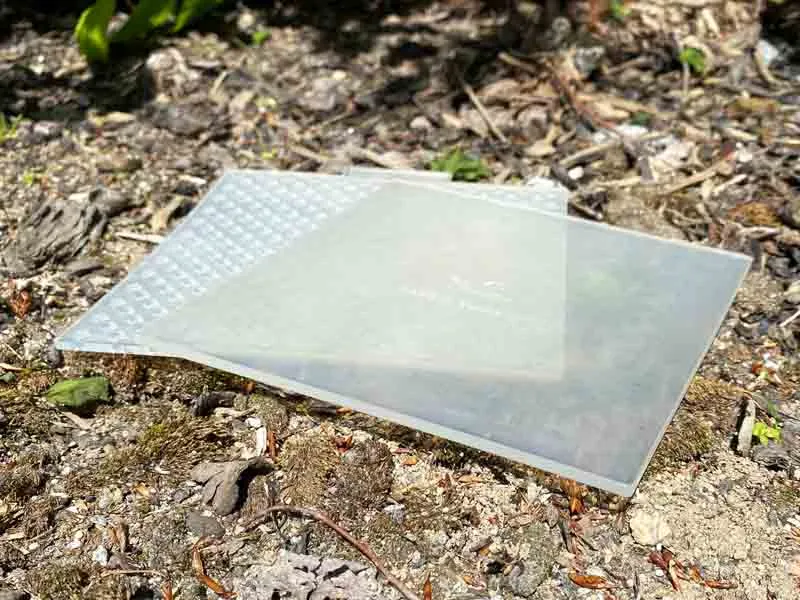
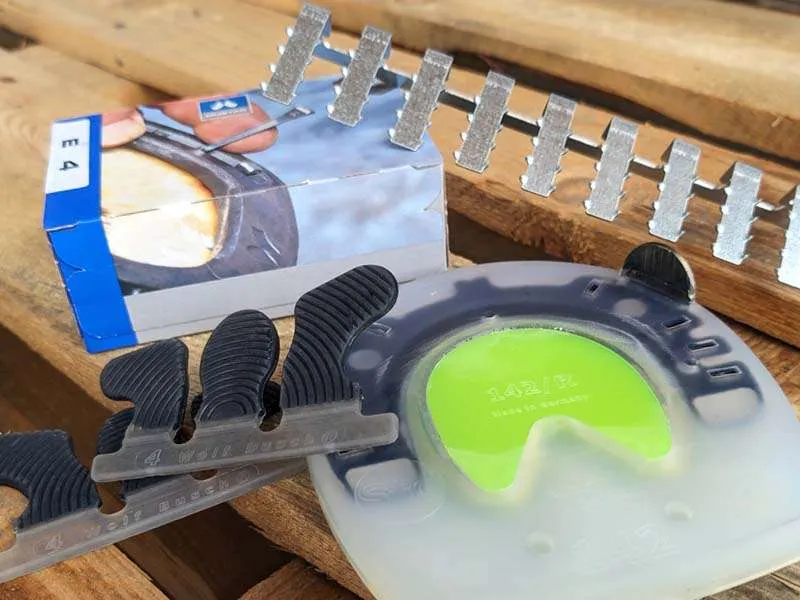
In a first step, we have added square synthetic plates to our range of products in order to close the sole area. These plates offer some flexibility as they can be custom-cut to fit any horseshoe size, but unfortunately, they are relatively cumbersome to weld into the horseshoe.

There is a grid version of the square plates available, which is particularly useful with moldable or liquid filling material, as excess filling material can exit through the holes, thus preventing unwanted pressure on the hoof. Of course, you can also drill appropriate openings in a completely closed sole.
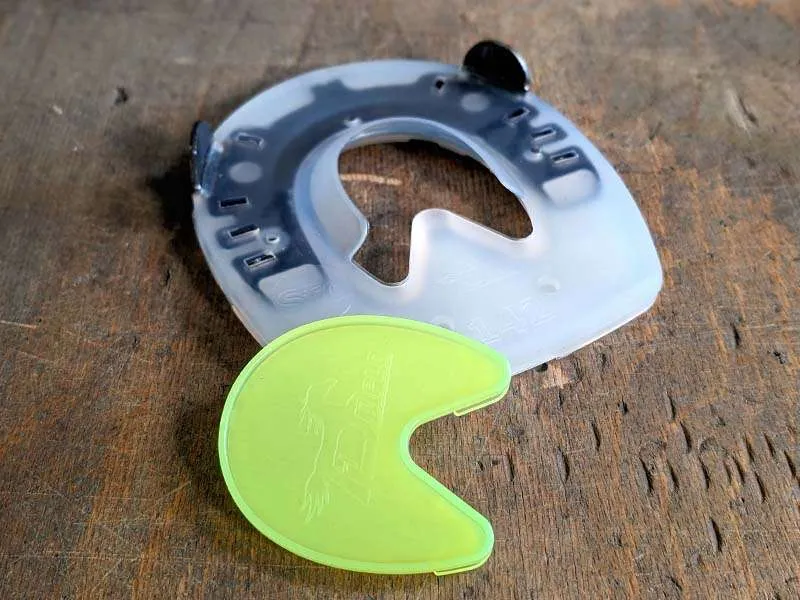
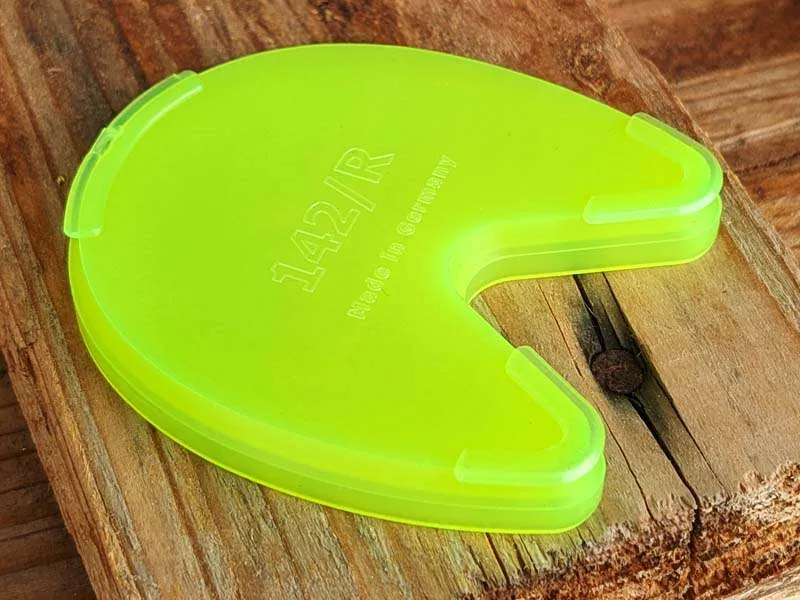
The optimized version of our square closure plates are our precision-fit closure plugs for the hoof sole area, which we call Hoof Sole Protector.
Application and Safety Instructions — Video
Please observe our safety instructions when working with our horseshoes and accessories.
Areas of Application for Closed Soles to Protect the Hoof Sole
There are various reasons that make it necessary to close the sole area of the horseshoe in order to optimally protect the horse's hoof sole.
- When it comes to protecting the hoof sole, the first thing that comes to mind are injuries or illnesses requiring the use of silicones or other packing material.
-
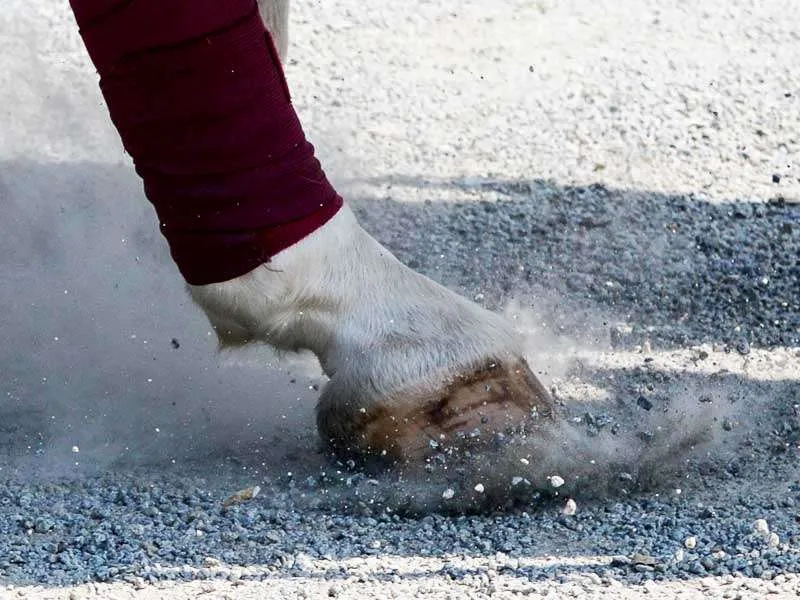
However, often it's simply about better protecting the hoof sole from external influences,
for
example because the horse frequently walks on very stony ground. Of course, it always
depends
on the horse — just like with us humans: Some of us can walk barefoot on gravel without any
problems,
while others wouldn't be able to take a single step forward in such conditions.
If a horse generally has a very sensitive hoof sole, you can help it by completely sealing the horseshoe in this area. - Another application of a closed sole area is during the winter season. Even though our integrated debris guard largely prevents the dangerous balling up of snow and ice under the horseshoe, there are occasional situations where it unfortunately still happens. The causes can vary, but whether it's due to the shape of the hoof sole or the particular consistency of the snow causing balling up — when nothing else works, the final option left is to completely seal the hoof sole.
In our range, we offer both a pure plastic horseshoe and a composite one with a closed sole area. However, if you require a different horseshoe due to your riding discipline or the ground conditions, you have the option to close the open sole area of your horseshoe using the Hoof Sole Protector.
Imagine the Hoof Sole Protector as a kind of closure plug for the hole in the middle of our horseshoes. Once the horseshoe is fully closed, you can use it with silicones or any other type of filling material to better protect the sensitive sole of the horse's hoof from external influences.
Step-by-step Guide: Closing an Open Sole Area Using the Hoof Sole Protector
Ensure adequate ventilation during all plastic welding work to seal the sole area in the horseshoe; ideally work outdoors. When using the heat gun, be careful not to overheat the plastic and follow the safety instructions of the heat gun device being used. Use a reduction nozzle to prevent hot air from radiating onto other areas of the horseshoe. And always remember that direct contact with melted or hot plastic, or the heat gun, can cause burns.
Selection and Adjustment of Your Horseshoes
Choose the appropriate model for the horse's hoof in the correct shape and size. Our Hoof Sole Protector can be combined with both our composite horseshoes and the pure plastic ones. You are therefore completely flexible when choosing the optimal horseshoe!
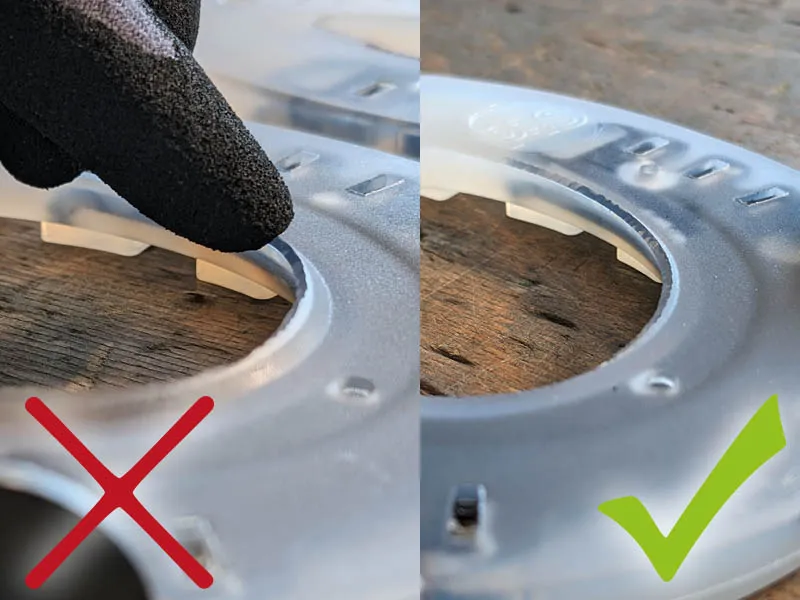
Customize the horseshoe to fit the hoof as usual and remove the integrated debris guard. For this purpose, we recommend clamping the horseshoe, for example, in a vice.
Ensure precise removal of the debris guard. Cutting away too much material may prevent the integrated hooks of the sole protector from properly gripping the horseshoe, making it more challenging to weld the protector into place.
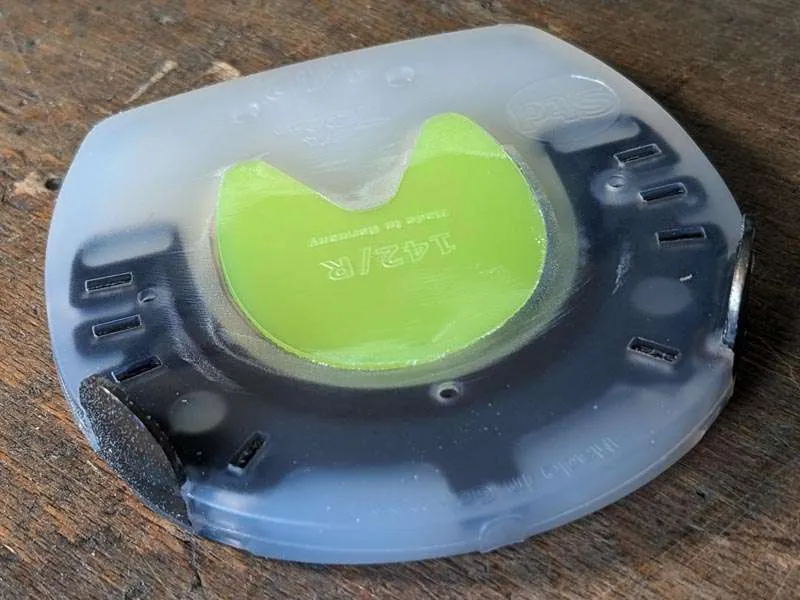
Based on the shape and size of the horseshoe, choose the corresponding Hoof Sole Protector. At the moment the Hoof Sole Protector is available in round and oval shapes.
Removing the debris guard of the composite horseshoe.
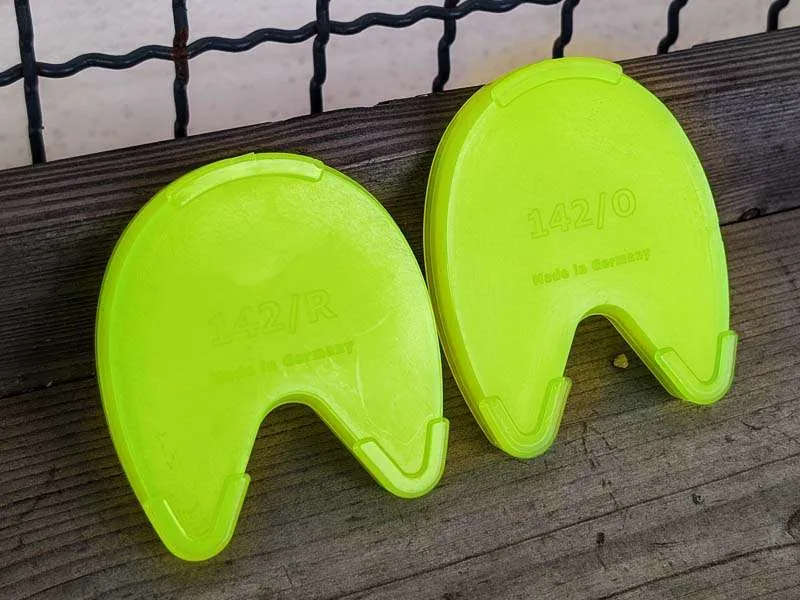
The Hoof Sole Protector is suitable for our round and oval horseshoes.
Closing the Sole Area of the Horseshoe
Thanks to a kind of click system, you can easily snap the Hoof Sole Protector into the horseshoe once the debris guard has been carefully removed.
The Hoof Sole Protector features a three-part plastic interlocking mechanism on the side facing the hoof, consisting of three hooks, which secure the sole protector and facilitate the plastic welding process.
If the hooks do not grip properly, it is likely that some plastic material was accidentally cut away when removing the debris guard that didn't belong to it. In this case, please try to somehow secure the Hoof Sole Protector for the welding work.
Three hooks are located on the side of the sole protector facing the hoof.
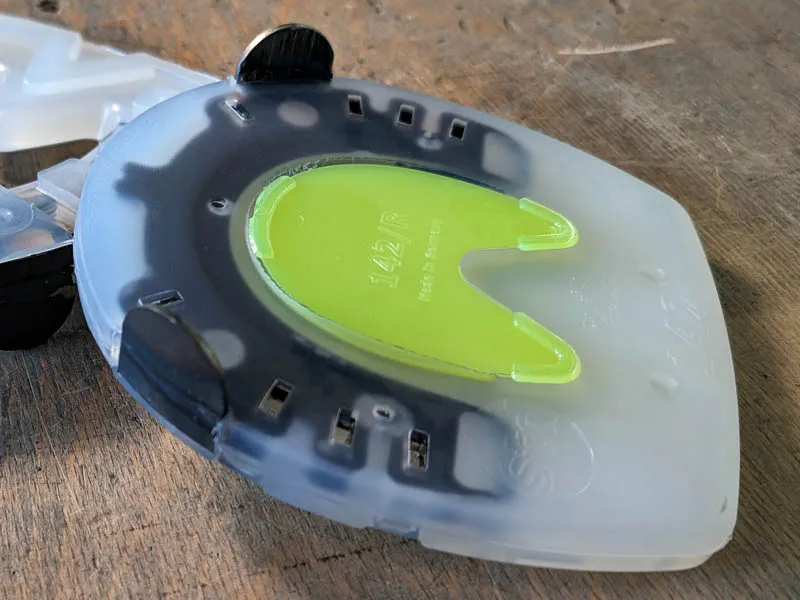
The Hoof Sole Protector after being snapped into the horseshoe.
Plastic Welding Hoof Sole Protector and Horseshoe
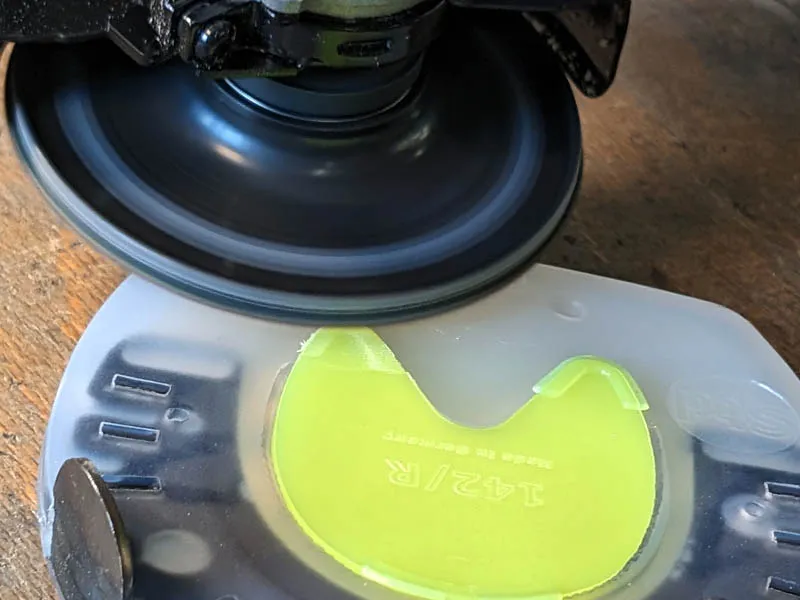
On the bottom side, i.e. on the side facing away from the hoof, our sole protector has a small plastic edge. This edge provides the necessary plastic material for the weld seam.
To weld the sole protector into the horseshoe, place it on a clean, flat surface. If the shoe has side clips, it's advisable to place it on the anvil or a table corner to prevent interference. For fixation, we recommend initially spot welding the HSP onto the shoe; this makes it easier to achieve a uniform weld seam afterward. Heat the plastic edge with a heat gun so that the plastic flows into the gap between the sole protector and the horseshoe. The proper angle of the heat gun's airflow is crucial; if it's too steep, the material may not flow into the right place.
The most important aspect when plastic-welding the sole protector into the horseshoe is to ensure that the weld seam runs seamlessly along the entire edge of the sole protector. Only then will you achieve the complete sealing of the gap between the sole protector and the horseshoe.
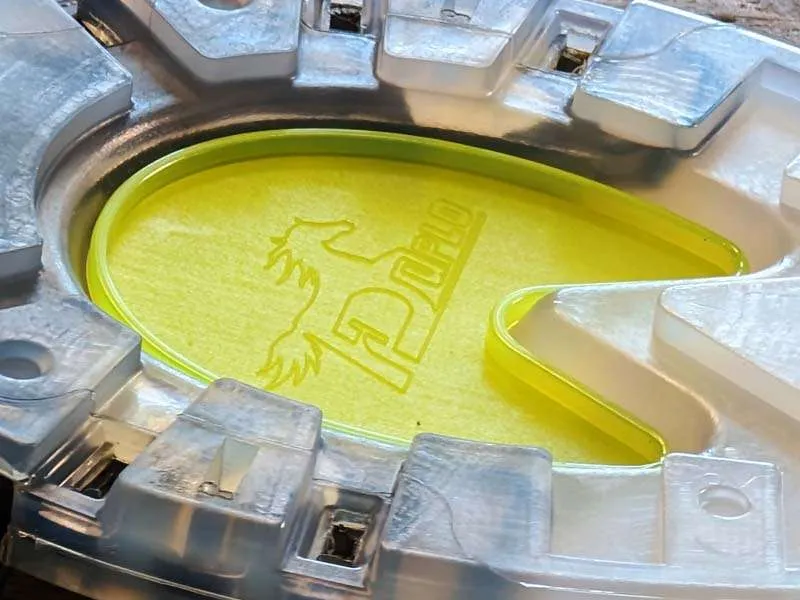
The small plastic edge of the protector provides the material for the weld seam.

Make sure to direct the hot air gun's airflow correctly.
Pressure Test — Test the Stability of Your Welding Seam
We recommend testing the stability of your weld seam once the plastic has cooled down. Cooling the weld seams with cold water is not recommended, as this can cause the plastic to become brittle. In order to test your welding seam, apply maximum force (for example with your thumbs) from the bottom side against the Hoof Sole Protector.
Imagine the forces acting on your weld seam when a horse steps on a stone, which then presses against the hoof sole protector from below. Therefore, you can press with full force! If the weld seam tears during your pressure test, it wouldn't withstand the load on the hoof either.
If you'd like, you can also perform the test in the opposite direction, although we assume that the greater pressure on the sole protection typically comes from the bottom side.

Verification of the stability of the weld seam between horseshoe and hoof sole protector.

The sole protection must withstand punctual pressure, for example from stones, at all times.
Final Steps
If you are satisfied with the results of the pressure test, it's time for the final work steps.
Carefully remove the protruding hooks on the hoof side of the sole protection, using an angle grinder.
After welding the hoof sole protector, take a brief look at the area of the horseshoe where there is a slight bevel on the hoof side that relieves pressure on the sole. Verify whether this area still intact after the welding process.
A small bevel on the hoof side of the horseshoe protects sensitive soles from undesirable pressure.
Removal of the protruding hooks.
Shoeing
If the welding work has been carried out correctly and the horseshoe has been optimally adjusted to the hoof, you can apply it as usual. Depending on the model, you can nail it, glue it, or use it as a cast shoe. The details, as well as corresponding shoeing instructions and safety guidelines, can be found in the product description of the horseshoe. For more detailed information on the application of a closed hoof shoe, please take a look at the "Clipped Horseshoe with Closed Sole Area".
Once the modified shoe has been fitted to the hoof, its function can be compared to our shoe with an integrated closed sole area. In both cases, when used without packing material, there is still a risk that dirt and small stones may find their way under the horseshoe. This could result in undesired pressure being exerted on the hoof sole.
Therefore, we always recommend using silicone or another type of padding material when using a horseshoe with closed sole area.
You have the choice — nailing, gluing, or the application as a cast shoe . The sole protector does not restrict the use of the shoe; you can use it as usual.
When gluing, ensure that the packing material does not seep out laterally, as it could negatively affect the adhesive bond.
Applying the Hoof Sole Protector — Video
At this point, we would like to briefly summarize the steps from an open to a closed sole area and provide you with a video tutorial .
- precise removal of the debris guard
- clicking the sole protector into the horseshoe
- seamless plastic welding of Hoof Sole Protector and horseshoe
- letting the weld seam cool down
- performing a pressure test
- final steps
With some practice, this modification option will provide you with maximum flexibility on-site to respond to the individual hoof situation as effectively as possible. Watch our video to see how straightforward it is to modify your shoe to better protect the sensitive hoof sole.

Video tutorial - Plastic Welding the Hoof Sole Protector in the Horseshoe
Product Features
| Product Details and Delivery Information | |
|---|---|
| Article | Hoof Sole Protector, grid plate and synthetic plate |
| Additional Description | precisely fitting closure plugs, sole protection; square closing plates |
| Brand | Duplo |
| Article Number |
Grid Plate: 000310 Synthetic Plate: 000311 Hoof Sole Protector Round Shape: 090 + size Hoof Sole Protector Oval Shape: 091 + size |
| Function | protect the hoof sole, seal the sole area of the horseshoe, close an open sole area of a horseshoe, modification accessories |
| Special Tools | hot-air gun and reduction nozzle |
| Application | plastic welding |
| Safety Advice | can be found under FAQ → Safety Information |
| Made in | Germany |
| Weight |
Grid Plate: 63g Synthetic Plate: 81g Hoof Sole Protector: depending on the size and shape |
| Dimensions Synthetic Plates | length: 147mm / width: 147mm / height: 3mm |
| Packaging Unit | by piece |
| Exchange and Return |
Possible under certain preconditions within 3 months within the European Union (EU). For returns from outside the EU, please contact the Customer Service Team. For further details, please look at FAQ → Service & Conditions. |


Manufacturer in accordance with the Regulation (EU) 2023/988 on General Product Safety (GPSR)
Manufacturer in accordance with the Regulation (EU) 2023/988 on General Product Safety (GPSR)
Name: H. Frank Kunststofftechnik GmbHElectronic Address: info@duplo-frank.de
Physical Address: Vorderfreundorfer Straße 20
ZIP Code: DE-94143
City: Grainet
Country: Deutschland
Phone: +49 (0)8585/96926-0
Responsible Person in accordance with the Regulation (EU) 2023/988 on General Product Safety (GPSR)
Name: H. Frank Kunststofftechnik GmbHElectronic Address: info@duplo-frank.de
Physical Address: Vorderfreundorfer Straße 20
ZIP Code: DE-94143
City: Grainet
Country: Deutschland
Phone: +49 (0)8585/96926-0