
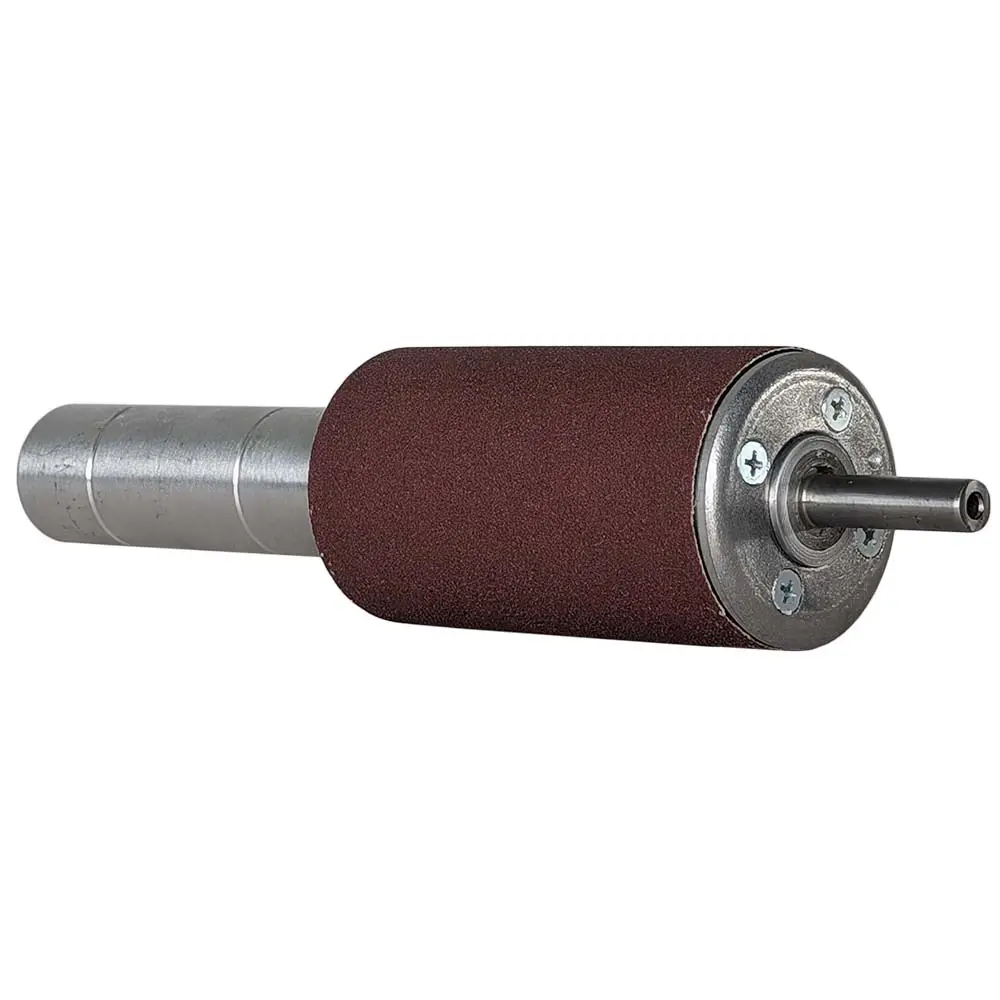
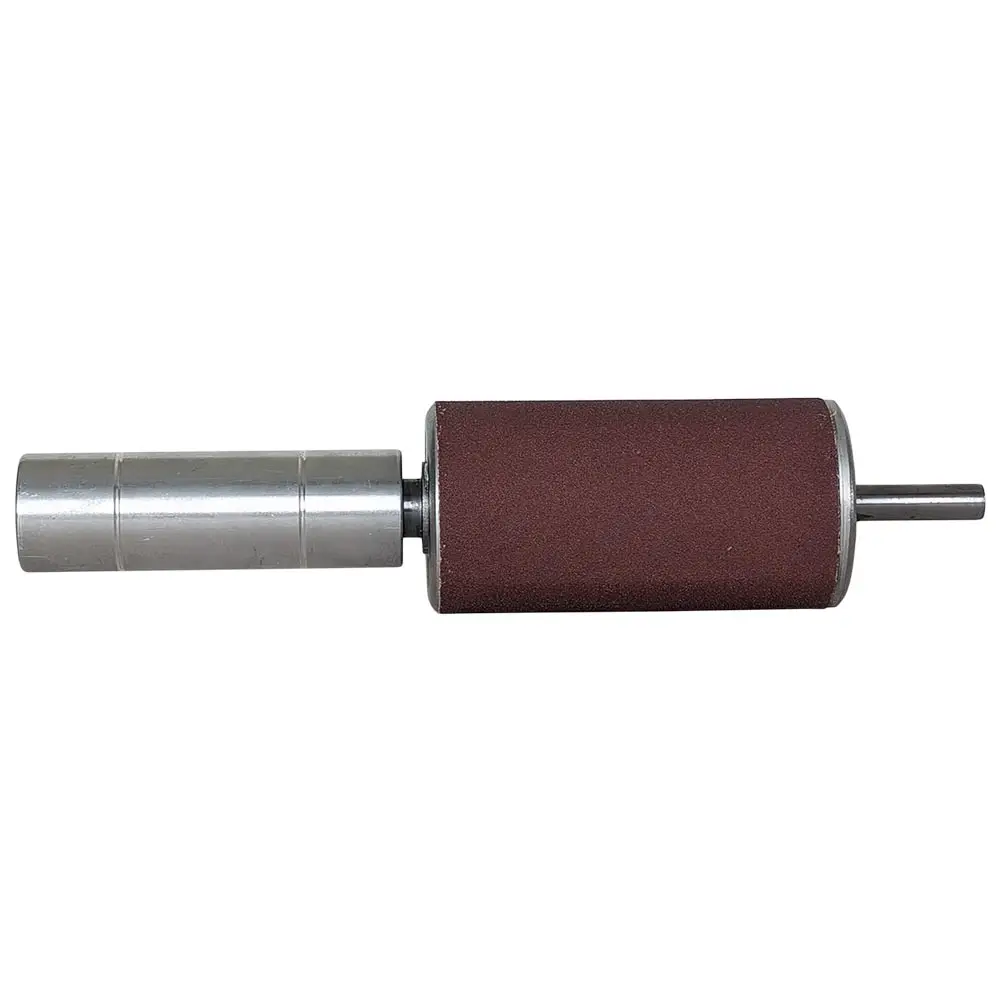
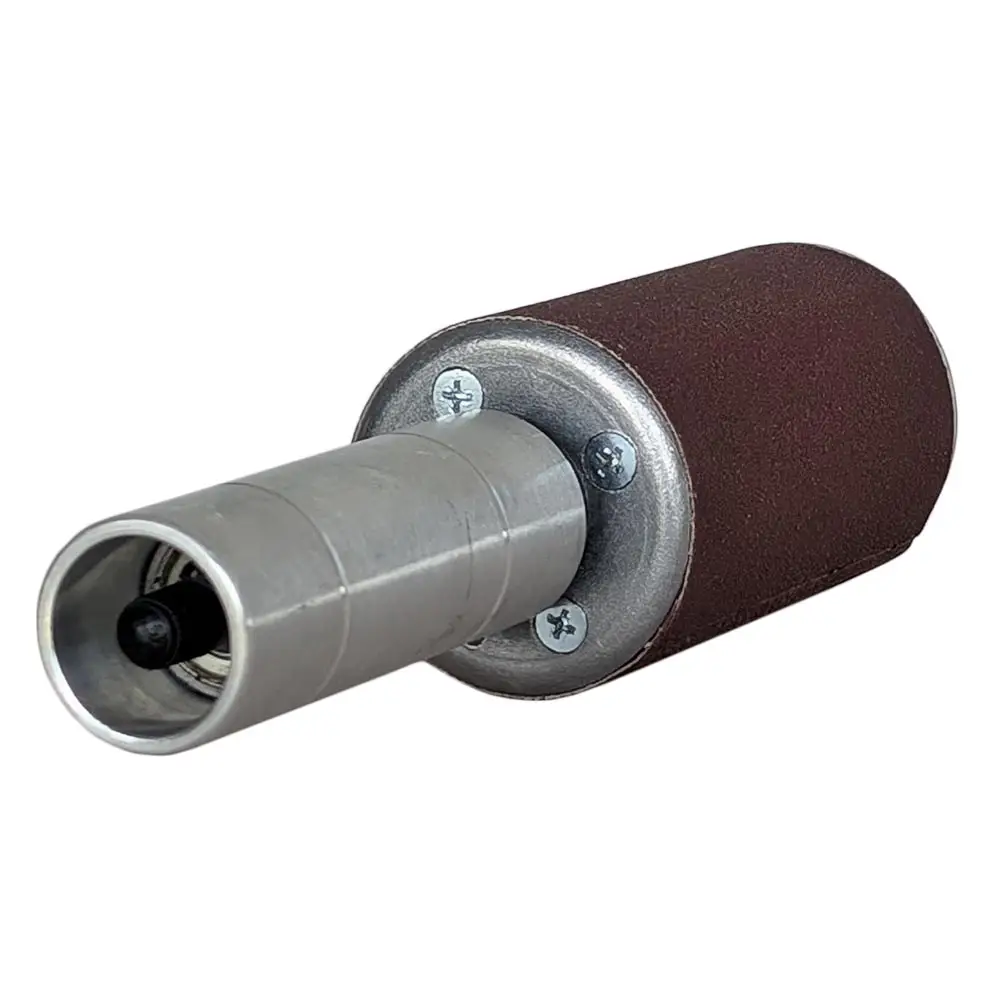

The Hoof Buffer / Hoof Buffy
When it comes to bare hoof trimming and the right finish, most people think of the hoof rasp. However, we are noticing that more and more customers are also moving towards "automation" in this area in order to make life easier for farriers and hoof care specialists and, not least, to protect their joints. One product that is very popular in this area within our range is the PFERD fiber disc and Combi-Click system.
Another trend that is becoming increasingly popular in the preparation for adhesive shoeing is the Hoof Buffer - also known as Hoof Buffy.
The Hoof Buffer in Detail
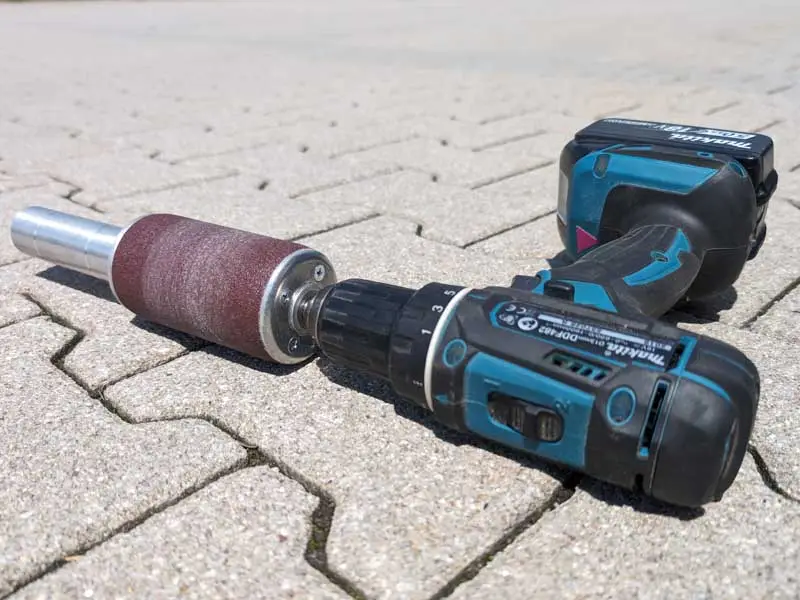
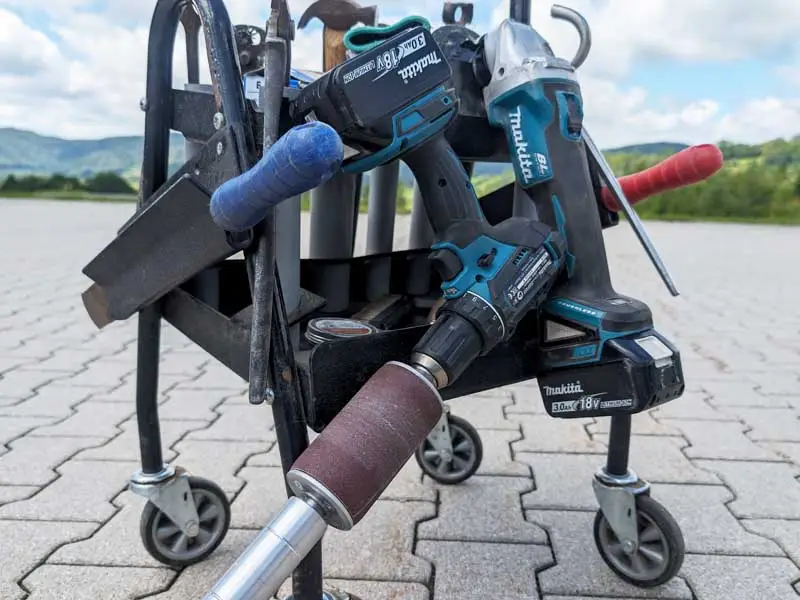
The Hoof Buffer can be used with a standard cordless screwdriver.
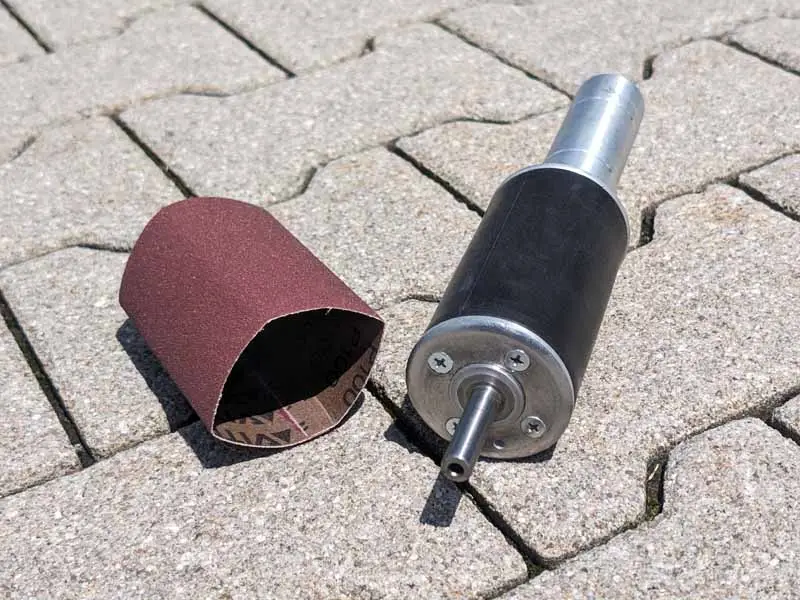
Suitable sanding belts with different Grit sizes are available for the Hoof Buffer.
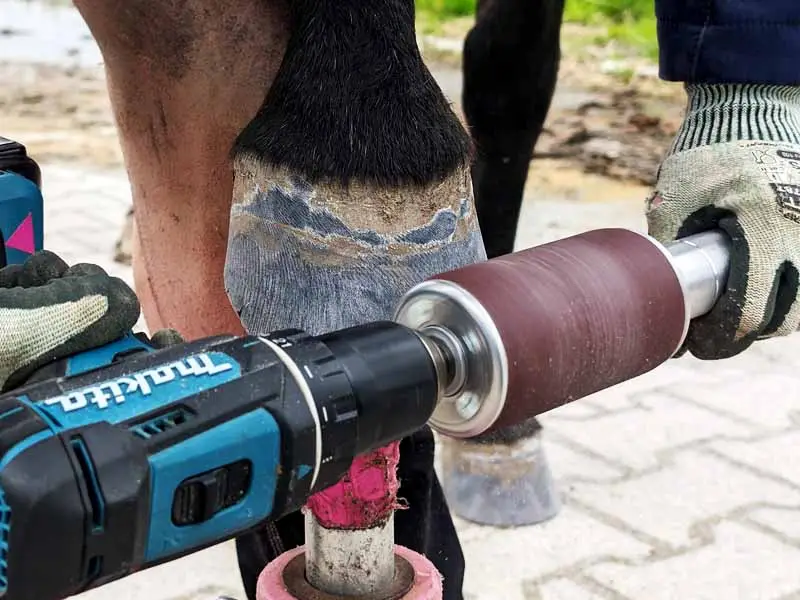
Many farriers and hoof care specialists like to use the Hoof Buffer for the final preparations before gluing.
Working with the Hoof Buffer and Changing the Sanding Belt – Video
How to Use the Hoof Buffer Correctly
- Please follow the safety and application instructions below.
- Insert the drive shaft of the Hoof Buffer into the drill chuck of your cordless drill and hold the Hoof Buffer firmly by the aluminium handle.
- Make sure the drill rotates in the correct direction so that the sanding dust is directed towards the ground rather than back onto the hoof.
The rotating sanding belt gives the hooves a beautiful shine. However, the Hoof Buffer is not only used for cosmetic purposes. If you plan to apply adhesive shoes afterwards, it creates an ideally prepared hoof wall for bonding the glue-on tabs to the hoof. We generally recommend using 60- or 80-grit sanding belts when preparing the hoof for gluing.
Both a compatible air pump and suitable sanding belts are available in our store.
Changing the Sanding Belt on the Hoof Buffer – Video
Changing the Sanding Belt
Unfortunately, it is not possible to give a general answer as to how long a sanding belt will last or how many hooves can be prepared for gluing with one sanding belt. Based on the information available to us, a rough average is around 10 horses.
With a little practice, the sanding belt can be changed quickly.
- Release the air from the rubber ring.
- Remove the old sanding belt.
- Fit the new sanding belt.
- Inflate the rubber ring until the sanding belt is securely in place.
- Do not use a compressor , as excessive pressure may cause the rubber ring to burst.
Hoof Buffer Care and Troubleshooting Air Pressure Loss
Protecting the Rubber Ring from Damage
Every Hoof Buffer is briefly inspected and carefully packaged before shipping. However, damage may still occur during daily use or as a result of improper storage. Make sure that the rubber ring does not come into contact with pointed or sharp-edged tools such as horseshoe nails, hoof knives or rasps.
As with a balloon, even the smallest cracks or holes can cause a gradual loss of pressure. As a result, the sanding belt may become loose over time and the Hoof Buffer may no longer function properly.
Troubleshooting Pressure Loss – When the Sanding Belt No Longer Fits Securely
Even with careful handling, the sanding belt may become loose or slip during use. However, this does not always mean that it is damaged. First check the air pressure in the rubber ring. If the rubber ring is not inflated sufficiently or air is trapped between the rubber ring and the sanding belt, add a little more air until the sanding belt fits securely.
Also check whether the valve is airtight and whether the screws on the flange are tightened evenly. If the problem persists, check the Hoof Buffer for leaks under water.
Checking for Leaks Under Water
First check the Hoof Buffer without the sanding belt and then with the sanding belt fitted. This allows you to determine whether air is escaping directly from the rubber ring, the valve or the flange area.
Checking it in both conditions is useful because small holes or cracks may only become visible when the Hoof Buffer is inflated and fully assembled.
The location of the escaping air bubbles will help you determine whether the rubber ring needs to be replaced or whether the leak has another cause.
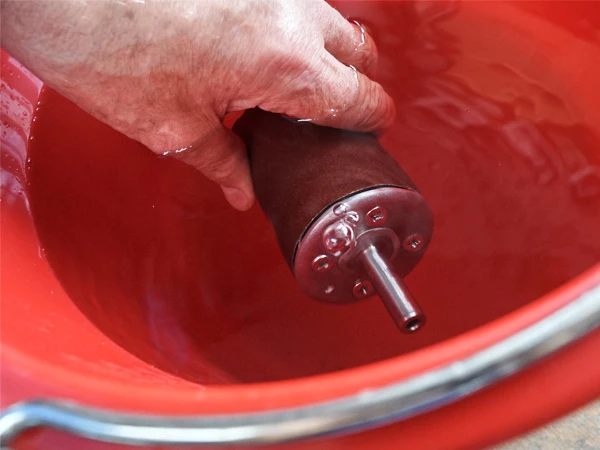
Checking Without the Sanding Belt
- Inflate the rubber ring without the sanding belt only for testing and while monitoring it, as it could otherwise be damaged.
- Remove the sanding belt.
- Inflate the rubber ring for testing.
- Fully submerge the rubber ring under water.
- Slowly turn the Hoof Buffer in different directions under water and watch for air bubbles.
-
If air bubbles rise directly from the rubber ring, it is damaged and must be replaced.
If no air bubbles are visible without the sanding belt, release the air again and fit the sanding belt.
Checking with the Sanding Belt
- Inflate the rubber ring again.
- Hold the fully assembled Hoof Buffer under water.
- Slowly turn the Hoof Buffer in different directions under water and watch for air bubbles.
- Use the air bubbles to determine where the leak may be coming from. If necessary, check the valve again, make sure the screws are securely tightened and check whether air is trapped between the sanding belt and the rubber ring. If air escapes from beneath the flange, the rubber ring may have shifted slightly or become pinched, preventing it from sealing properly against the flange. The flange or sealing edge may also be damaged.
- Correct the cause where possible, for example by tightening the screws or adjusting the air pressure, and repeat the underwater test.
Replacing the Rubber Ring
We have summarised the most important steps for replacing the rubber ring and highlighted several important details in the images. We also refer to an English-language video tutorial from the YouTube channel Farrier Products (Video ID: 4L6d8rifes). The video may help you follow the individual steps more easily. This will help you get your Hoof Buffer ready for use again quickly.
Please note that this is a third-party video. We cannot accept any liability for its content or whether the information is up to date. For this reason, we have chosen not to include a direct link here. Our team will be happy to assist you with any questions about the individual steps.
Step-by-Step Instructions
- Use a suitable screwdriver and do not overtighten the screws.
- Remove and fit the rubber ring by hand only, as tools may damage the soft sealing edge (No. 1 in the image).
- Release all the air and remove the sanding belt.
- Loosen all eight screws.
- Remove the front flange (No. 2 in the image).
- Loosen the flange on the handle side only until the rubber ring is free. The flange does not need to be removed.
- Remove the rubber ring by hand.
- Fit the new rubber ring over the sealing edges on both sides by hand.
- Secure the flange on the handle side first.
- Screw in all four screws until they reach the flange, but do not tighten them yet.
- If necessary, hold the flange and rubber ring in position with light pressure while tightening the screws.
- Lightly tighten one screw. Then tighten the screw opposite it.
- Turn the Hoof Buffer and gradually tighten the remaining screws on the handle side in a crosswise pattern.
- Secure the second flange at the front of the Hoof Buffer in the same way. Gradually tighten the screws in a crosswise pattern.
- Fit the sanding belt. Details can be found in the separate instructions.
- Inflate the rubber ring as usual.
Key Details in Pictures – Photos for Illustration
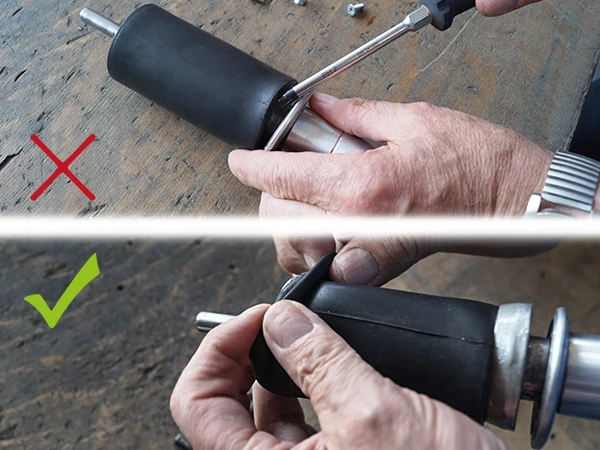
Correct: Replace the rubber ring by hand.
Incorrect: Replace the rubber ring using tools.
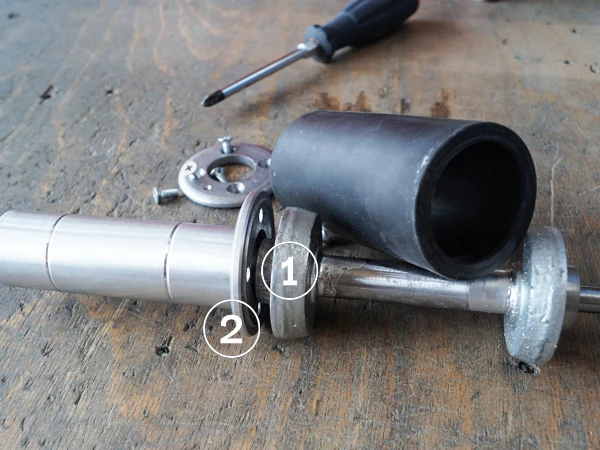
Marker 1: Sealing edge
Marker 2: Flange
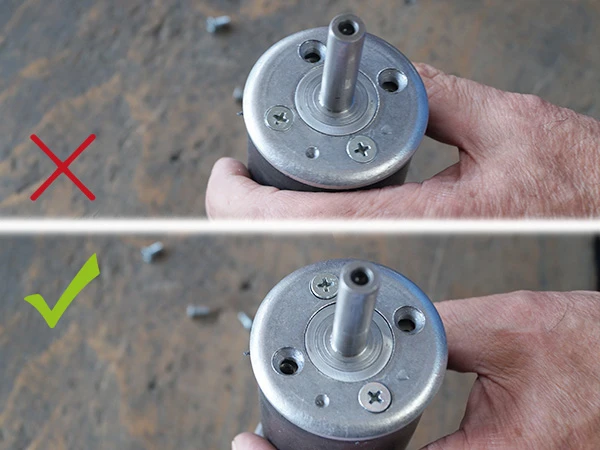 Correct: Tighten the screws in a crosswise pattern.
Incorrect: Tighten adjacent screws one after another.
Product Specifications
| General Information and Delivery Details | |
|---|---|
| Model | Hoof Buffer "Buffy" and Accessories |
| Product Numbers |
Hoof Buffer: ZHB000 Rubber Ring: ZHB001 Air Pump: ZHBLPA 40-Grit Sanding Belt: ZHB040 60-Grit Sanding Belt: ZHB060 80-Grit Sanding Belt: ZHB080 100-Grit Sanding Belt: ZHB100 |
| Pack Sizes | Please note that the items must be ordered individually; they are not sold as a complete set. Only the Hoof Buffer itself includes several components in the scope of delivery. Hoof Buffer: attachment including one 80-grit sanding belt, valve stem and valve key Rubber Ring: available individually Air Pump: available individually Sanding Belts: pack of 10 |
| Exchange and Return |
Possible under certain conditions within 3 months within the European Union (EU). For returns from outside the EU, please contact our Customer Service Team. For further details, please refer to FAQ → Service & Conditions. |
| Functions and Areas of Application | |
|---|---|
| Function | perfect show shine for the hooves, a perfect gloss, and roughening the hooves for gluing |
| Accessories | cordless screwdriver, air pump, sanding belt |
| Safety Instructions | |
|---|---|
| General Safety Instructions | Please also observe the safety instructions provided by the manufacturer of your cordless screwdriver and the usual measures when working with electrically powered abrasive belts. Inspect your buffer for any damage before each use and only use the Hoof Buffer if it is in proper working condition. Be mindful of the increased risk of injury from the rotating parts. Additionally, ensure the correct air pressure in the buffer, as improper pressure can result in the sanding belt not being securely held. Only use compatible sanding belts with the buffer. |
| Sanding the Horse's Hooves | Special care must be taken with all horses — whether they are accustomed to sanding or not — when working on the hind hooves: Please always have a second person hold the tail! Otherwise, there is a risk of the Hoof Buffer getting caught in the tail if the horse swats at flies, for example. |
| Safety Instructions |
You can find the safety instructions
for our
products and the third-party products available from us under FAQ →
Safety Instructions. |
| Safety Instructions as a PDF Download | PDF Download |
Manufacturer in accordance with the Regulation (EU) 2023/988 on General Product Safety (GPSR)
Manufacturer in accordance with the Regulation (EU) 2023/988 on General Product Safety (GPSR)
Name: KerckhaertElectronic Address: post@kerckhaert.com
Physical Address: Rapenburg 76
ZIP Code: 4581 AE
City: Vogelwaarde
Country: Nederland
Responsible Person in accordance with the Regulation (EU) 2023/988 on General Product Safety (GPSR)
Name: KerckhaertElectronic Address: post@kerckhaert.com
Physical Address: Rapenburg 76
ZIP Code: 4581 AE
City: Vogelwaarde
Country: Nederland